

Your Guide to Arranging The Faux Earthy Arrangement
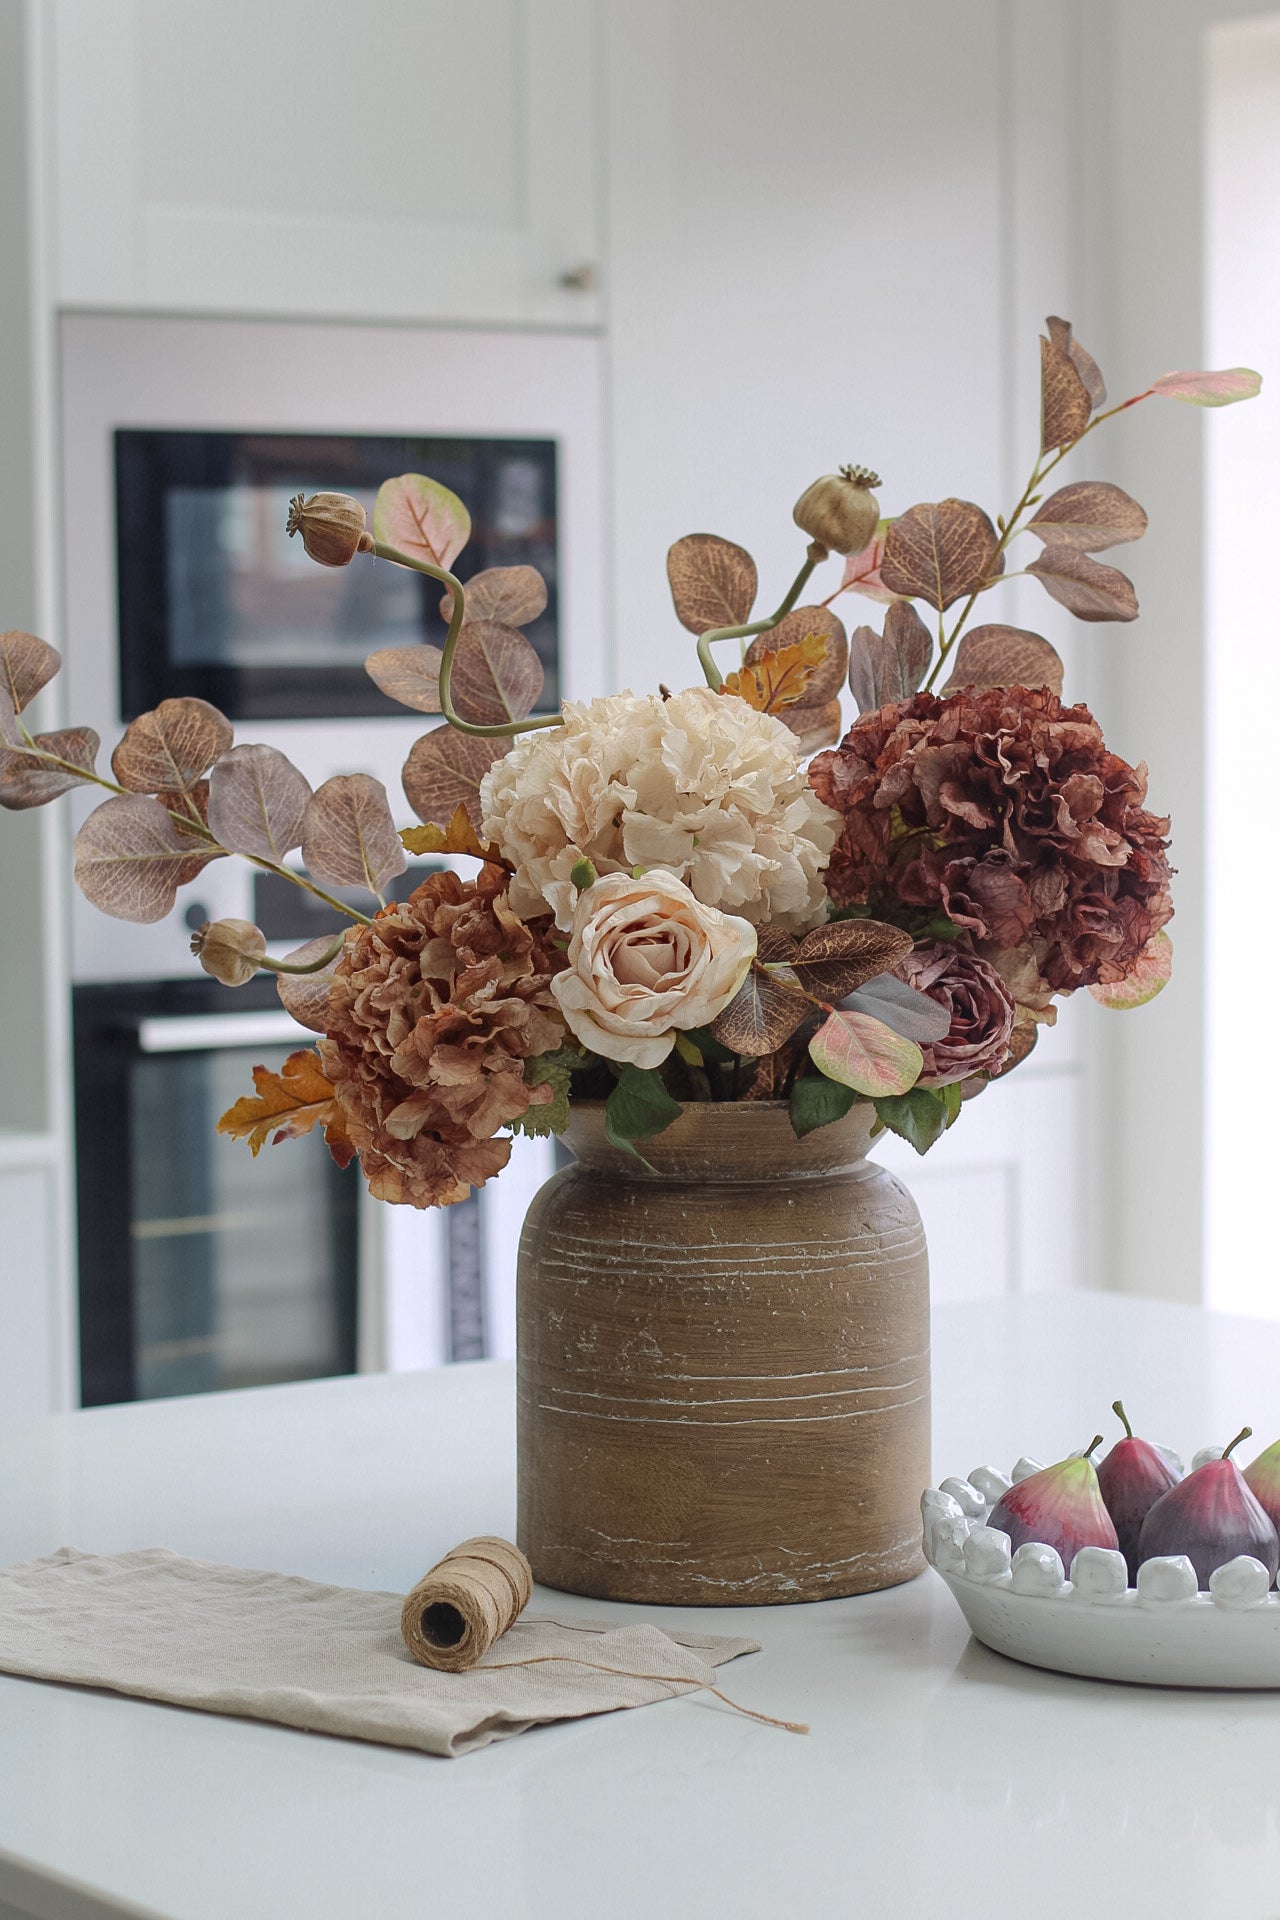
It’s back and even better than before! Our best-selling faux Earthy Arrangement is back, and it’s had a little upgrade. This arrangement was inspired by the beautiful warm, earthy tones of Autumn. Even though the arrangement was inspired by Autumn its one that works wonderfully every season. The faux arrangement is filled with our dried inspired flowers, there’s a romantic feel with hydrangeas, roses, eucalyptus and one of our new stems. From our timeless collection, our new blush poppy head spray is now included in the arrangement. This stem is perfect for adding depth and height to the arrange.
Which vase works best with the Earthy Arrangement?
As this arrangement is filled with those beautiful neutrals, browns and touches of Burgundy I love styling the Earthy arrangement in the small Burwell vase. This one is a real statement piece, with its unique wood effect finish and deep tones, it works beautifully with the arrangement. Although if the Burwell vase is a little too dark for your home, the arrangement would look beautiful in the Audlem vase.
How do I arrange the Earthy Arrangement?
I know sometimes faux flower arranging can feel a little daunting but don’t worry I’m going to pop a step-by-step guide below and I’ve included our YouTube tutorial. My advice with flower arranging is always just take it slowly and enjoy the process. If you don’t feel like it’s working, take a minute, make a cup of tea and come back to it with fresh eyes. As you begin working with your flowers you might find they don’t stay in the positions you want, this is something I found really frustrating to begin with but as you start adding more stems and building your base (or scaffolding, I like to call it) they will start to prop each other up and stay in place.
Step-by-step guide to arranging the Earthy Arrangemen
Separate your stems
As with all arrangements I always find it’s easiest to start by separating your stems. I like to keep each of my different flowers and foliage separate, that way I find as I begin arranging, I can clearly see how many of each stem I’ve got to work with.
Work out how tall you’d like your arrangement to beOne of the best things about faux florals is you have long stems to play with, this means you can make most stems work in any vase. Once you’ve chosen your vase and where you’re going to put your arrangement you can decide how tall you want your arrangement to be. The beauty of faux floral stems is they have wire inside them so they can be manipulated to the height you require. I always say if you’re using a clear glass vase cut the stems as this will look more realistic. However, if you’re using an opaque vase, you can bend the stems, this way you still have that height if you wish to use them in a different vase or arrangement later.
Start with your foliage
I like to start creating my floral arrangements by placing in the foliage. Stand your stem up against the vase and work out the height of your arrangement and how tall you’d like it to stand in your vase. Begin by bending or cutting the stem to the correct height. There’s two of the Burgundy Eucalyptus stems in this arrangement, these are quite full stems, so they are best placed on either side of your vase. Make sure you are fluffing out your foliage stems so they can really frame the arrangement. You will start to see there is a scaffolding building inside your vase this is exactly what you want as it will allow your other stems to prop each other up.
Next, I would add the blush poppy head stem. This is a long stem so it can be a little tricky to bend. It’s such a beautiful statement stem, with its twisted design I like to make sure the stem is facing outwards with each of the poppy heads in a triangle design in your arrangement.
It’s time to add your flowers
It’s time for the best bit, your flowers! As this arrangement has quite a lot of big flowers, I think it’s best to start with them. I like to have the biggest flowers at different heights and pointing in different directions, in an arrangement as I think this looks the most natural. Bend your hydrangeas to varying heights around your arrangement, try to make sure they aren’t all facing towards the front of the arrangement. Next, it’s your roses, as they are similar colours to your hydrangeas, I like to dot them around the arrangement and have the contrasting colours together.
Final fluffing
Once everything is arranged in the vase, I like the step back and take a good look at everything. Are there any big gaps? Is anything leaning too much one way? It’s your time now to fluff out the stems and make sure your happy with how everything looks.
There you have it your Faux Earthy Arrangement. If you would like more tips and advice, you can watch our YouTube tutorial. Or if you’d prefer to create your own arrangement, we have lots of different stems and foliage to choose from. I’d love to know how you get on with your flower arranging, make sure you tag us on Instagram #ivygreyinteriors


